
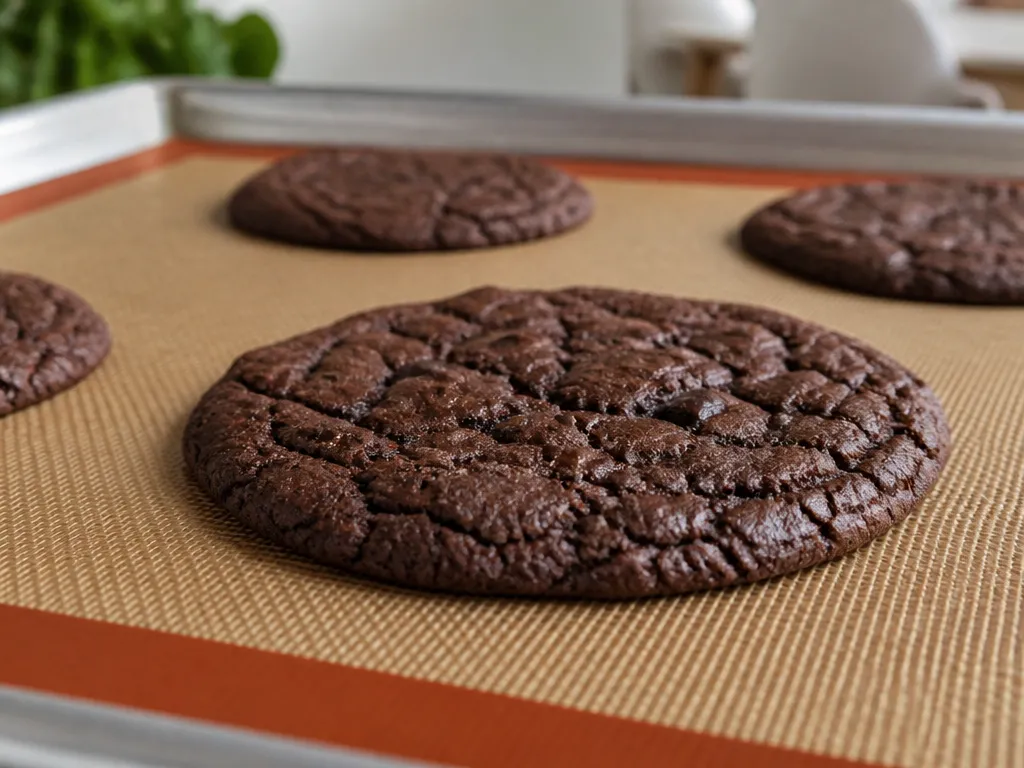
Chocolate cookies spread too much when melted fat and dissolved sugar outpace the dough’s ability to set in the oven. The usual causes are warm dough, too much sugar, too little flour, overmixing, or an oven and pan that delay the cookie’s structure from firming up. A practical target is to put the dough in the oven at ≤45°F / 7°C, with the flour measured accurately and the oven fully preheated.
Key Takeaways
- Temperature is usually the biggest factor. Under-chilled dough or a warm pan keeps butter liquid longer, so cookies spread more.
- Sugar changes viscosity. Packed or high-moisture sugar dissolves into liquid and can increase spread.
- Flour provides structure. Too little flour or weak protein structure leaves the dough unable to hold its shape.
- Mixing can warm the dough. Over-creaming and overmixing make butter easier to melt and move.
- Oven accuracy matters. Even a calibrated oven can fluctuate by about ±15°F, changing how quickly cookies set.
- The fastest fix is cold, portioned dough. Chill or freeze it, verify the oven temperature, and bake on parchment or a nonstick liner.
Why Chocolate Cookies Spread Too Much
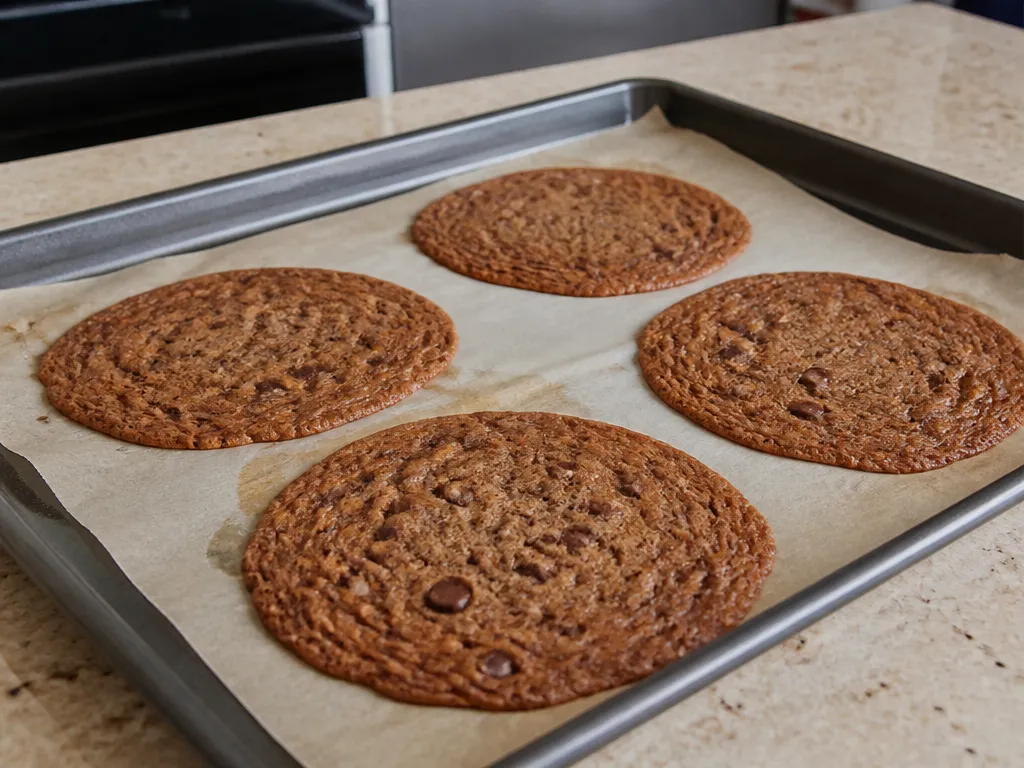
Chocolate cookies spread too much because the dough becomes fluid before the oven can create a stable structure. Warm butter melts quickly, sugar dissolves and encourages flow, and insufficient flour leaves too little starch and gluten to hold the cookie’s shape. The result is a mound that turns into a thin, wide cookie before the edges and surface set.
Chocolate cookie dough is especially sensitive because it often contains plenty of sugar and fat. A dough that looks thick in the bowl can relax into a glossy, loose mixture as it warms. That change is a warning sign: the dough needs more structure or more chilling before it goes into the oven.
The Main Causes of Excessive Cookie Spread
Warm butter, heavy sugar measurements, and inaccurate flour measurements cause most spreading problems. Chilling, oven temperature, and the baking surface then determine whether the dough sets quickly enough to hold its shape.
- Butter was warm when you creamed it. Cold dough resists flow; warm dough spreads.
- You packed the brown sugar or measured heavily. Brown sugar holds moisture, and extra sugar can make the dough more fluid.
- You estimated the flour. Scooping or loosely filling a cup can leave you with less flour than the recipe expects.
- You skipped chilling. Even a modest chill firms the butter and slows melting.
- The oven runs cool or the preheat was too short. Cookies spread more when the surface sets later.
- The pan was warm or heavily greased. Extra grease and early heat can encourage the dough to flow.
Compare the dough’s shape before and after baking. If it is already thin and then flattens rapidly during the first few minutes, warm butter or insufficient structure is the likely problem. If it looks right in the bowl but becomes a wide, lacy cookie later, oven temperature or pan heat may be delaying the set.
How Butter Temperature and Sugar Affect Spread
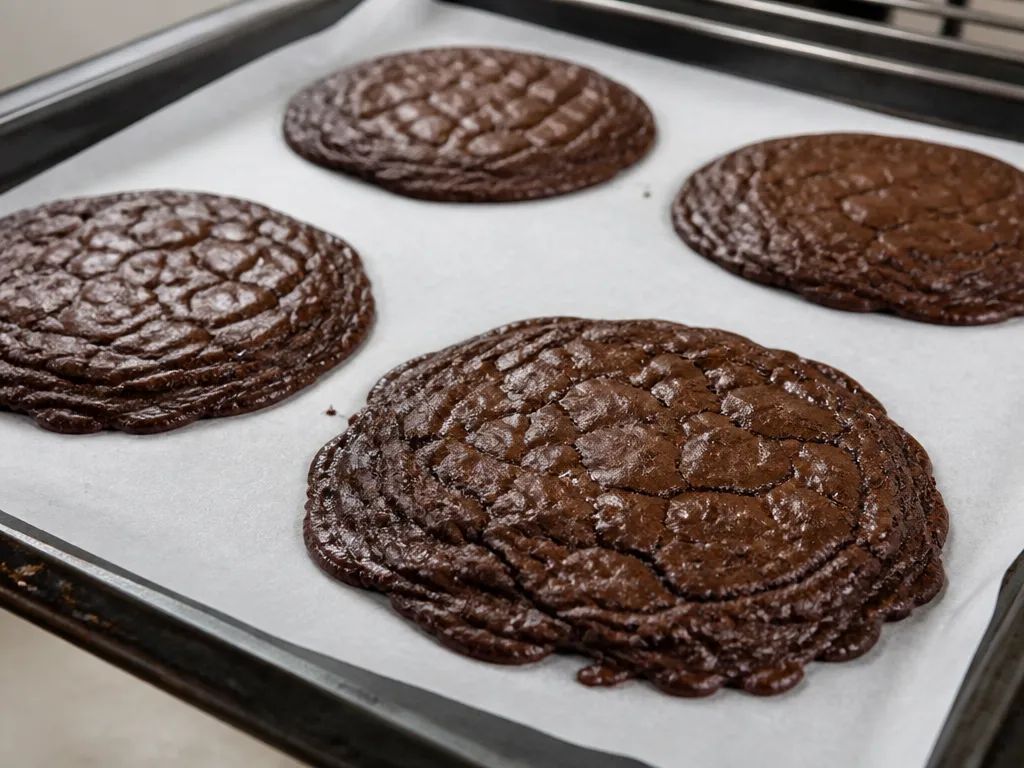
Butter temperature controls how quickly the dough liquefies in the oven. When butter is too warm during mixing, it distributes more easily and melts sooner. The fat then spreads outward before the flour’s starches and gluten can thicken the cookie.
Keep the dough cool enough that it is not loose when you portion it. A practical target is to bake dough that enters the oven at ≤45°F / 7°C. This is a useful control point rather than an absolute rule: the colder, firmer dough gives the cookie more time to set before it flows too far.
Sugar affects both viscosity and moisture. As sugar dissolves, it contributes to the liquid phase of the dough. Brown sugar holds more moisture than granulated sugar, so it can increase spread when combined with warm butter or too little flour.
A high sugar-to-flour ratio can also make the cookie look glossy and soft early in the bake before it flattens. Correct flour and cold dough help the surface set sooner, producing thicker edges, more defined domes, and fewer puddles.
Flour Measurement and Mixing Problems
Flour supplies the structure that holds a cookie together as butter melts. Too little flour means too little starch and gluten to thicken the dough, so the fat and sugar flow outward with less resistance.
Flour measurement is a common source of error. Scooping directly from the container can compress the flour and produce inconsistent results. Filling a cup loosely can do the opposite, leaving you with less flour than the recipe requires. When you under-measure flour, the dough becomes more fluid and spreads faster.
Mixing also affects the result. Over-creaming warms the butter and breaks down its crystals, making the fat easier to melt and move. Cream butter and sugar only until the mixture looks pale and fluffy, then stop. Add the dry ingredients last and mix only until they are incorporated.
In cookies, mixing more does not necessarily create more structure. The goal is to hydrate the flour and combine the ingredients, not to whip extra air into the butter or develop the dough aggressively. Overmixing can warm the dough and make its spread harder to control.
Oven Heat, Baking Sheets, and Pan Choice
Oven heat determines how quickly the cookie’s outer surface sets. A cool oven or a short preheat delays that set, allowing the dough to spread farther. A hot oven can set the outside quickly, but uneven heat may still cause irregular melting and thin edges.
Even calibrated ovens can fluctuate by about ±15°F. That difference can change how quickly butter melts and how fast the cookie reaches the point where its surface firms. Cookies that consistently spread on one side or turn lacy may be reacting to uneven oven or pan heat.
Use parchment or a nonstick liner instead of greasing an aluminum sheet. Extra grease can increase spread, and a sticky pan may tempt you to add even more.
The pan itself affects heat transfer. Thin baking sheets can develop hot spots where the butter melts early. Heavy-gauge pans generally distribute heat more evenly, which helps produce more consistent edges and domes.
An oven thermometer removes one of the biggest variables. The cookie responds to the actual temperature and how long the oven has stabilized, not the number shown on the dial.
How to Keep Chocolate Cookies From Spreading
Portion the dough before chilling or freezing so it cools evenly and is ready to bake without extra handling.
Keep the sugar and flour balance accurate. Do not pack sugar, guess at the flour, or add extra liquid ingredients such as vanilla. Swapping ingredients or changing amounts can also make the dough looser. Chocolate cookie dough is already rich, so small measurement changes can push it toward excessive spread.
Make the oven predictable as well. Preheat it fully, use an oven thermometer if spreading continues, and bake on parchment or a suitable nonstick liner. The basic principle is simple: a cookie spreads when it contains liquid fat and dissolved sugar but does not set quickly enough. Either reduce the dough’s liquidity before baking or help it set sooner in the oven.
The 4-Step Anti-Spread Protocol
These four steps address the most common causes: warm dough, inaccurate flour, excessive mixing, unstable oven temperature, and unsuitable pan conditions.
- Portion, then chill or freeze. Portion the dough – for example, a #40 scoop is 1.5 tbsp / 22g – and chill it so the butter firms before baking. For stubborn spread, freeze the uncovered portions for 45 minutes, then bake them straight from the freezer.
- Measure the flour accurately. Use the recipe’s stated flour amount and measure it consistently. Under-floured dough can spread even when the oven temperature is correct. If the mixed dough looks looser than expected, treat that as a warning before baking.
- Cream less and mix less. Cream the butter and sugar only until pale and fluffy. Add the dry ingredients last and mix just until incorporated; a few lumps are fine. Overmixing warms the dough and can worsen spread.
- Preheat and verify the oven temperature. Preheat to the recipe temperature and let the oven stabilize, rather than loading the pan as soon as it reaches the target. If possible, place an oven thermometer on the center rack and confirm that the temperature holds steady before baking. One practical target is 375°F for a full 25 minutes, followed by 3 minutes of steady temperature before baking.
For the quickest next-batch fix, use the portioning, chilling, parchment, and temperature-checking steps above.
FAQ About Why Do Chocolate Cookies Spread Too Much?
Why do chocolate cookies spread more than other cookies?
Chocolate cookie dough is often rich in sugar and fat, so it can melt and flow quickly. Under-measured flour creates another common problem by reducing the structure needed to thicken and hold the cookie’s shape.
What’s the fastest fix if my dough is already mixed?
Chill the dough immediately, preferably after portioning it so the pieces cool evenly. If the dough is clearly soft, freeze the portions for about 45 minutes before baking. Use parchment or a nonstick liner so you do not need extra grease to prevent sticking.
Can overmixing cause cookies to spread too much?
Yes. Over-creaming warms the butter and breaks down its structure, making it easier to melt and spread. Mixing too long after adding flour can also warm the dough and alter its texture, pushing the cookies toward a thinner shape.
How long should I chill cookie dough to prevent spreading?
A short chill helps, but portioned dough needs to become noticeably firm before baking. For stronger control, freeze the portions for 45 minutes. If you use the refrigerator, chill the dough until it feels firm rather than relying on a fixed time alone.
Is it better to bake at a higher temperature to stop spreading?
No. Higher heat can set the outside faster, but it can also cause uneven melting and wider spread when the dough is already warm. Accurate preheating and a stable oven temperature produce more consistent results. Use an oven thermometer if the cookies keep spreading from batch to batch.
Disclosure: As an Amazon Associate, I may earn from qualifying purchases at no extra cost to you. Amazon and the Amazon logo are trademarks of Amazon.com, Inc, or its affiliates.
