
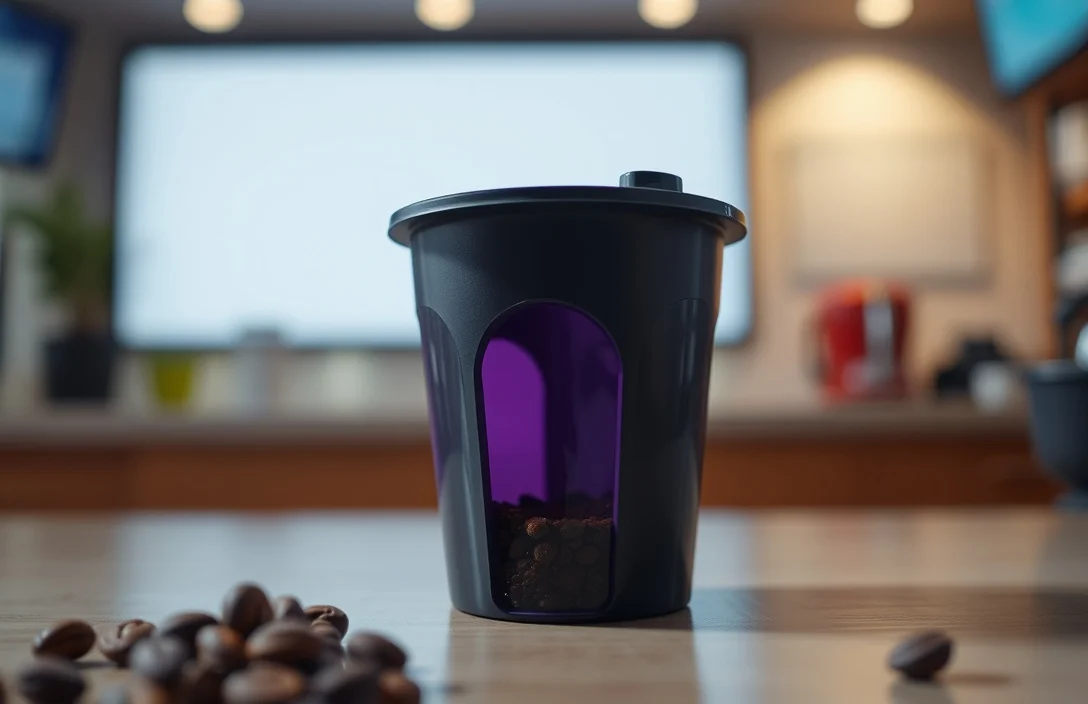
If your reusable K-Cup leaks grounds into the brew, you’re likely facing a seal or fit issue rather than an incorrect coffee dose. Leaks typically stem from a few common causes: the lid not snapping shut, the silicone seal not seated correctly, or using a pod that doesn’t match your brewer’s design. This guide offers practical checks and seven fixes you can apply in under 15 minutes, along with diagnostics to pinpoint your specific problem.
Seven effective fixes can stop grounds from ending up in your coffee. Begin with the simplest checks: listen for the lid to click cleanly, inspect the seal groove, and ensure the pod is compatible with your brewer. If leaks continue, work through the diagnostic sequence and apply the appropriate fix. By the end, you’ll know whether you need a replacement part or a model-specific pod. The goal is a tight, drip-free seal with every brew.
Key takeaways help you act quickly. First, a proper lid click is the most reliable indicator that the seal is engaged. Second, mis-seated silicone seals account for many leaks and can often be resolved by reseating them. Third, never exceed the max fill line; overfilling creates back pressure that pushes grounds through the seal. Fourth, MultiStream brewers operate differently from single-needle machines; choose pods accordingly. Fifth, regular cleaning keeps the seal and mesh free of residue that can cause leaks.
Page Contents
ToggleQuick Fixes for Reusable K-Cup Leaks
Leaks usually occur due to how the pod sits and seals inside the brewer. Start by checking the lid and seal, then confirm the pod’s compatibility with your brewer’s water delivery system. If you find grounds near the seam, inspect the gasket and mesh for wear. Typically, a 30-second diagnostic will reveal most simple issues: a lid that isn’t snapping, a mis-seated seal, or overfilling. If a quick reseat doesn’t solve the problem, identify your Keurig model and ensure you’re using the right pod for its system.
Approach leaks as a chain of causes rather than a single defect. Inspect the pod, lid, and seal one at a time. If the gasket is mis-seated, it will show silicone partially exposed or grounds escaping along the lid seam. If the lid clicks but grounds still appear, the issue may be a worn filter mesh or an incompatible pod. By following these diagnostics, you’ll determine whether a quick reseat, a cleanup, or a new pod is needed.
In many cases, a thorough wipe-down and a fresh seal seating eliminate leaks. Before disassembling parts, perform a quick dry run to ensure the lid clicks and the port seals are intact. A deeper clean to remove ground buildup around the hinge can prevent future leaks. If issues persist, you may face a design mismatch or a worn component, and identifying your brewer model will help you select the appropriate pod.
7 Fixes for Reusable K-Cup Leakage
These fixes address the two most common failure modes: a seal that doesn’t seat properly and a pod that doesn’t suit the brewer’s water delivery method. Apply these fixes in order from simplest to more involved.
- Confirm the lid snaps and sits flush. If the lid doesn’t click, water can bypass the seal, carrying grounds into the cup. Re-seat the lid firmly and listen for a confident click. If the click is faint or missing, replace the lid or the entire reusable pod assembly.
- Re-seat the silicone gasket in its groove. A gasket that has slipped or sits unevenly allows water and grounds to escape. Remove the lid, work the gasket back into its groove, and reassemble. Visually confirm that the gasket sits evenly with the lid and body edge.
- Don’t overfill the pod. The max fill line is crucial; overfilling creates pressure that forces grounds through the seal. If you must fill near the top, use a slightly coarser grind to reduce resistance as water flows through.
- Check the mesh and filter integrity. Worn or damaged mesh allows grounds to escape during brewing. Replace any compromised mesh or the whole pod if wear is evident. Regular inspections reduce recurring leaks.
- Match the pod to the brewer’s water delivery system. Some pods designed for single-needle brewers leak in MultiStream machines, and vice versa. Use manufacturer guidance to choose a pod compatible with your model.
- Clean the needle pathways and piercing points. Coffee grounds can become lodged around needles and perforations, creating channels for leakage. Run a vinegar or dedicated brewer cleanse cycle as per your machine’s manual, then rinse thoroughly.
- Confirm the lid snaps and sits flush. If the lid doesn’t click, water can bypass the seal, carrying grounds into the cup. Re-seat the lid firmly and listen for a confident click. If the click is faint or missing, replace the lid or the entire reusable pod assembly.
| Inspect for overall wear and age. Plastics and seals degrade over time; even a well-sealed pod can leak if the gasket becomes stiff or the body warps. If the pod is older than 1-3 years, replacement is often the simplest solution for leak-free performance. | Fix | What it fixes | Typical time to implement |
|---|---|---|---|
| Lid snaps fully | Prevents leaks at lid seam | 1 minute | |
| Silicone gasket reseat | Stops water from bypassing seal | 2 minutes | |
| Don’t overfill | Reduces back pressure and leakage | 1 minute | |
| Mesh/filter integrity | Prevents grounds escaping through worn mesh | 3-5 minutes | |
| Pod-to-brewer compatibility | Prevents in-brewer leakage due to system type | 2-5 minutes (selection) | |
| Clean needles and perforations | Removes lodged grounds | 5-10 minutes | |
| Replace aged pod | Guards against premature wear | 5-15 minutes |
How to Apply the Fixes
Start with the lid and gasket. Most leaks can be resolved there. If you hear a clean click and still see grounds, move to reseating the gasket and inspecting the seam for gaps. Next, confirm you’re using the correct pod for your brewer. MultiStream machines require different pod geometries than single-needle systems. A mismatched pod often leaks where water disperses.
If leakage continues, running a thorough cleaning cycle is worthwhile. It clears mineral and coffee residue that obstruct seals and flow paths. Finally, consider replacing the pod if you notice damage or wear, or if your brewer is older and out of warranty. A fresh pod minimizes the chances of repetitive leaks.
Common Causes of Leakage
Leakage typically falls into three categories: sealing failures at the lid or gasket, compatibility mismatches between the pod and the brewer’s water delivery system, and wear in the pod’s mesh or body that hosts the seal. Symptoms include audible lid clicks or their absence, visible grounds around the seam, or grounds appearing even on simple brews with minimal pressure. In most households, leakage results from a combination of factors.
A frequently observed culprit is a misaligned silicone gasket. Even a small gap can channel grounds into the brew chamber. Over time, residue accumulates, making reseating harder, so checking the gasket periodically is wise. Another common cause is using a pod that doesn’t match the brewer’s water delivery format. Newer MultiStream brewers spray water through several holes for even extraction; a pod designed for a single needle can misbehave in that environment, leading to uneven flow and leaks. Clogged filters and worn mesh also contribute to grounds escaping, particularly in older or heavily used pods. Replacing the pod or mesh is often more economical than continually addressing leaks.
The most actionable step is pairing a quick diagnostic with a test brew. If leaks appear only with certain pods, you likely have a pod-to-brewer mismatch. If leaks occur across all pods, focus on the lid, gasket, and sealing surfaces. A routine 30-second test before each brew – checking for the lid click, inspecting the seam, and confirming the pod is seated correctly – will catch most issues early.
Improper Sealing Causes Leakage
An improper seal is often the primary issue. A lid that sits awkwardly or a gasket that isn’t flush creates a path for hot water to bypass the intended seal. A mis-seated seal often presents as visible silicone or a gap along the lid seam. Tightening the lid and reseating the gasket usually resolves the problem immediately.
To fix improper sealing, remove the pod and inspect the seal with the lid open. Check for any warping that prevents the lid from closing cleanly. If the seal sits high or low relative to the lid, readjust it so that the sealing edge sits flush against the body. After reseating, reassemble and perform a test brew with water only to confirm the seal holds. If the problem persists, the seal or lid may be damaged, necessitating replacement.
For both new and used pods, periodic cleaning of the lid hinge and sealing groove prevents leakage from residue buildup. Coffee oils can accumulate around the hinge, hardening and making a tight seal difficult. A mild vinegar bath or dedicated cleaner between uses keeps the gasket pliable and the edges clean, reducing the risk of stubborn leaks.
Overfilling the Cup
Overfilling is a common cause of grounds leakage. The max fill line prevents pressure from building up in the pod and forcing grounds past the seal. When overfilled, you create a pressure differential that the seal cannot fully block. Even with a tight lid, excess grounds can be forced through the mesh or accumulate at the seam, leading to grounds in the cup or the machine’s cooling chamber.
Practice discipline with the fill line. If you need stronger coffee, adjusting the grind size, density, or tamping can help achieve a bolder brew without overflow. Remember that balanced extraction is the goal, not simply a taller cup at the cost of leaks. If you frequently brew over the line, consider using a larger cup setting with a coarser grind to preserve seal integrity.
A practical tip: measure your ground dose with a scale to ensure accuracy. Small differences in dose can affect water pressure in the pod, impacting the seal. If overflows persist despite adjusting grind and dose, you may be dealing with an unusual cup size or a misread fill line on your pod design. Consult the pod’s documentation to align precisely with it.
Clogged Filter Causes Leakage
A clogged or degraded filter allows grounds to accumulate near the seal, especially during brewing. The filter serves as a barrier; when blocked, it alters water flow through the pod, potentially pushing grounds outward. A clean, intact filter maintains smooth flow and keeps grounds contained.
Maintenance is key. Rinse the pod thoroughly after each use to remove oil residues that can bind to the filter, making clogging more likely. Periodic deep cleaning of the entire pod, not just the outer surfaces, extends the life of the mesh. If the mesh becomes visibly damaged, replace the pod instead of attempting repairs; a compromised mesh poses a leak risk regardless of other factors.
If you suspect clogging, run a cleaning cycle recommended by the machine’s manufacturer, or soak the pod in a vinegar solution briefly to break down oils. After soaking, rinse thoroughly and air dry before reusing. A clean mesh ensures the brew path remains clear and reduces leakage chances from blocked pathways.
Silicone Seal Misalignment Causes Leakage
A mis-seated silicone seal is a frequent driver of leaks. When the seal slips out of its groove, it creates a gap that water and grounds can exploit during brewing. Signs include an offset seam, partially exposed silicone, or grounds visible around the lid hinge. This issue often arises after cleaning or repeated use when the seal hasn’t been reinstalled correctly.
To fix this, remove the lid and reposition the silicone seal so the edge sits flush in its groove. Check the alignment around the entire pod. If the seal is deformed or cracked, replacement is necessary. After reseating, test with water to ensure the leak is resolved before brewing coffee.
A smart practice is to perform a quick visual check every few cycles. If the seal shifts out of its groove, consider replacing the pod assembly to ensure a reliable seal. A fresh seal eliminates the root cause of most leaks and reduces the need for constant reseating.
Single Needle Brewing Systems
Single needle machines deliver water through the center of the pod via one piercing point. While this design is simpler and often less prone to certain leaks, it can be sensitive to pod geometry. If the pod does not align with the needle position, you may see issues with sealing or extraction that resemble leaks around the lid or seam. Breaches occur near the central puncture rather than along a multi-point spray path.
To minimize issues, choose reusable pods specifically designed for single-needle brewers. Check the pod’s compatibility with your exact brewer model and ensure the shape and mesh align with the needle location. If leaks persist after confirming compatibility, inspect the pod for deformation near the piercing point and consider replacement.
Once compatibility is confirmed, diagnosing leaks becomes easier: they usually diminish when the pod aligns correctly with the needle. If grounds still appear after proper alignment, check the gasket and lid edge for other potential sealing problems. A clean path from pod to cup enhances flavor while reducing leak risk.
MultiStream Brewing Systems
MultiStream brewers spray water through multiple points, which can exacerbate leakage if the pod geometry isn’t matched to the system. Pods designed for MultiStream systems typically have different internal designs or mesh arrangements, and a mismatch can produce leaks at the seams or edges. In this complex system, a well-sealed pod is particularly critical.
Always verify that the pod is explicitly labeled for MultiStream use with your Keurig model. If leaks occur, inspect how the pod sits in the cradle and whether the gasket aligns with all spray points. If necessary, switch to a MultiStream-compatible pod that matches your brewer’s water distribution pattern.
Many leaks in MultiStream systems arise from using a pod that fits physically but cannot seal properly against multiple spray holes. The solution is often a redesign of the pod or a model-specific pod. If leaks continue, review the maintenance steps for the MultiStream system to ensure all spray holes and seals are clean and unobstructed.
Identify Your Keurig Model
Identifying your model is crucial because the pod ecosystem varies with system type and age. The same reusable pod can behave differently on a K Mini compared to a higher-end model with more piercing points. Start by locating the model name or number on the machine’s bottom or back panel, and cross-check it with the manufacturer’s compatibility guides. A pod design mismatch is a frequent cause of leaks.
Knowing your model allows for tailored troubleshooting. For example, a MultiStream model may require a different pod than a single-needle model, and certain drip paths may be more sensitive to seal wear. If you lack exact model information, follow the diagnostic path by testing with a known compatible pod and a new seal or lid to differentiate the root cause.
Additionally, keep a small log of which pods work best with your model and under what grind and fill conditions. Over time, this data helps identify patterns – whether your leaks recur after specific brew settings or post-cleaning. With a clear model reference, you can select the right pod and avoid common mismatches that lead to leaks.
Recap of Fixes and Diagnostics
Leaks arise from a handful of predictable sources: lid seating, gasket misalignment, fill level, mesh wear, and system-pod compatibility. Start with simple physical checks – the lid click and gasket alignment. If leaks persist, test with a new pod that matches your brewer’s system (Single Needle vs MultiStream). A clogged mesh or worn filter may require a pod or mesh replacement. Lastly, confirm that you’re staying within the max fill line to prevent back pressure from forcing grounds past the seal.
Diagnostics should be a steady routine: listen for the lid click, visually check seal seating, confirm pod compatibility, then perform a water-only test to see if leaks occur without coffee grounds. If leaks persist despite thorough checks, the issue is likely wear (seal, gasket, or pod) or an intrinsic mismatch between pod design and your brewer’s water delivery system. Replace the compromised part and re-test.
To ensure a dependable, leak-free cup, adopt a short, repeatable ritual before every brew: inspect the pod for mesh integrity, verify the seal is seated, confirm the lid clicks, and ensure you’re within the recommended fill line. If all checks pass but leaks continue, reassess compatibility – working through model-specific pod alignment until the leak disappears.
FAQ About Reusable K Cup Leaking Grounds In Coffee
Can a reused K-Cup leak even if it previously worked fine?
Yes. A gasket shift or lid distortion can occur after cleaning or handling. Additionally, wear compounds over time, especially on older pods. Inspect the seal for a consistent flush fit and replace if you notice warping.
How do I diagnose a leak quickly?
Perform a 30-second diagnostic: verify the lid clicks, inspect the seal, reseat if necessary, and run a water-only test. If water flows freely without coffee grounds, the issue is seal-related rather than a clogged mesh.
Is a single-needle brewer more prone to leaks?
Not inherently; the leak pattern differs. Single-needle systems can leak if the pod geometry misaligns with the piercing point, while MultiStream systems can leak if the pod isn’t compatible with multiple spray holes.
Should I clean the K-Cup between uses?
Yes. A light cleaning reduces residue that can hinder a clean seal and lead to leaks. A deeper monthly clean keeps the hinge and seal free of oil buildup.
What should I replace first when leaks persist?
Start with the pod assembly – lid and gasket – and then replace the pod if you observe wear. If leaks continue, test with a new model-compatible pod and confirm you’re using the right type for your brewer.
Disclosure: As an Amazon Associate, I may earn from qualifying purchases at no extra cost to you. Amazon and the Amazon logo are trademarks of Amazon.com, Inc, or its affiliates.
