

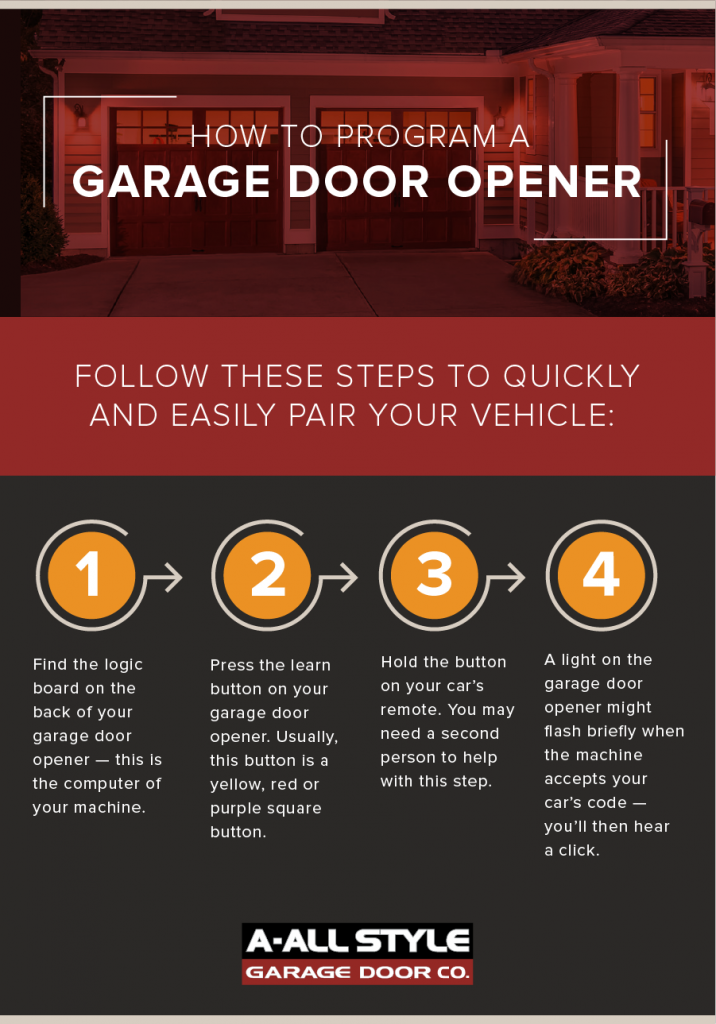
Do you want to take control of your garage door with ease? Programming your garage door opener remote might sound tricky, but it’s easier than you think.
Imagine never fumbling for your keys again or struggling with a stuck door. In this guide, you’ll discover simple steps to set up your remote quickly and confidently. Keep reading, and by the end, you’ll have your garage door working perfectly at your fingertips.
Types Of Garage Door Remotes
Garage door remotes come in several types. Each offers different features and ease of use. Knowing these types helps you choose the best remote for your needs.
Standard Remotes
Standard remotes are the most common type. They use radio signals to open and close the door. These remotes are small and easy to carry. Programming them usually involves pressing a few buttons on the remote and the garage door opener.
Smartphone-controlled Remotes
Smartphone remotes use apps to control the garage door. They connect via Wi-Fi or Bluetooth. These remotes offer more control and monitoring options. You can open or close the door from anywhere. Some apps send alerts if the door is left open.
Keypad Remotes
Keypad remotes let you enter a code to operate the door. They are mounted outside the garage. This type is useful if you want keyless entry. You can share the code with family or friends. Changing the code is easy for security.
Preparing For Programming
Preparing to program your garage door opener remote is the first step to a smooth setup. Proper preparation saves time and avoids frustration. It ensures your remote and opener work well together. Follow these simple steps before starting the programming process.
Gathering Necessary Tools
Collect all tools needed for programming. Usually, you need the remote control and the garage door opener manual. A ladder may help reach the opener unit. Keep a pen and paper ready to note any codes or instructions.
Checking Remote Compatibility
Confirm the remote matches your garage door opener model. Check the brand and model number on both devices. Using an incompatible remote will not work. Look for compatibility details in the opener manual or on the remote packaging.
Ensuring Garage Door Opener Is Powered
Make sure the garage door opener has power. Check if it is plugged in and the circuit breaker is on. Without power, programming will fail. Test the opener by using the existing remote or wall control switch.
Locating The Learn Button
Finding the Learn button is the first step in programming your garage door opener remote. This button allows your remote to connect with the opener unit. Knowing where to find it saves time and frustration. The Learn button is small but important. It controls the pairing process between your remote and the garage door opener.
Common Locations On Opener Unit
The Learn button is usually on the back or side of the garage door opener unit. It may be near the antenna wire or the light bulb socket. Look for a small square or round button. Some models hide it under a light cover. Check the manual if you cannot find it easily. Most Learn buttons are colored red, yellow, orange, or purple.
Identifying The Learn Led Indicator
Next to the Learn button, there is often a small LED light. This light blinks when the opener is ready to pair with a remote. The LED helps confirm that you pressed the Learn button correctly. It may stay on for about 30 seconds. During this time, press the remote button to complete programming. The LED turns off after the process ends.

Credit: www.youtube.com
Programming Standard Remotes
Programming a standard garage door remote is a simple task. It lets you control your garage door from a distance. This process involves resetting old codes, pressing the learn button on the opener, and syncing the remote with the opener. Follow these steps carefully for a smooth setup.
Resetting Existing Codes
Start by clearing old codes from your garage door opener. This step prevents interference from previous remotes. Find the “reset” or “clear” button on your opener motor. Press and hold it for about 10 seconds. The opener’s light may blink, signaling that codes are erased. This resets the system to accept new remotes.
Pressing The Learn Button
Next, locate the “learn” button on the garage door opener. It is usually near the antenna or light. Press this button once. A small light near it will turn on or blink. This mode allows the opener to accept new remote signals. You have about 30 seconds to complete the next step.
Syncing The Remote With The Opener
Press the button on your remote that you want to program. Hold it until the opener’s light blinks or you hear a click. This confirms the remote and opener are synced. Test the remote by pressing its button to open or close the garage door. Repeat these steps if the remote does not work the first time.
Programming Keypad Remotes
Programming keypad remotes allows easy and secure access to your garage. These devices use codes to open the garage door without a physical remote. Programming them correctly ensures your garage stays safe and convenient to use.
Follow simple steps to set your access code and link the keypad to the garage door opener. This process usually takes only a few minutes and does not require special tools.
Setting The Access Code
Start by choosing a 4 to 8 digit code. Avoid simple sequences like 1234 or 0000. Enter the code on the keypad. Press the “Enter” or “Set” button to save it. Your keypad will confirm the code with a light or sound.
Linking The Keypad To The Opener
Find the “Learn” button on your garage door opener motor. Press and release this button. Within 30 seconds, enter your access code on the keypad. Press “Enter” or “Send” to link the keypad. A light or sound usually confirms a successful link.
Programming Smartphone Apps
Programming your garage door opener using a smartphone app makes controlling your door simple and fast. Most modern garage door systems offer apps that let you open and close the door remotely. These apps also provide extra features like notifications and scheduled operations. Follow clear steps to set up your app and connect it to your garage door opener.
Downloading The Manufacturer’s App
Start by finding the app from your garage door opener’s manufacturer. Check the app store on your phone. Search using the brand name of your garage door opener. Download and install the app with a tap. Make sure the app is the official one to avoid security risks. Once installed, open the app to begin setup.
Connecting To Wi-fi
Most apps need your garage door opener to connect to Wi-Fi. This connection lets your phone control the door from anywhere. Go to the app’s settings and find the Wi-Fi setup option. Select your home Wi-Fi network from the list. Enter the Wi-Fi password carefully. Wait for the app to confirm a strong connection. A stable Wi-Fi link is key for smooth operation.
Pairing The App With The Opener
Pairing links your app to the garage door opener securely. Follow instructions in the app to start pairing mode on your opener. This may involve pressing a button on the garage door motor. The app will search for the opener nearby. Once found, select it and confirm pairing. Test the app by opening or closing the door. Successful pairing means your phone can now control the garage door.
Troubleshooting Common Issues
Troubleshooting common issues with your garage door opener remote helps you avoid frustration. Small problems can stop the remote from working properly. Fixing these issues often takes just a few steps.
Knowing what to check first saves time and effort. This section covers the main problems many users face. Follow these tips to get your remote working again quickly.
Remote Not Responding
Start by checking if the remote is within range of the garage door opener. Sometimes, the remote is too far away to send a signal. Press the button firmly and watch for any signs of response, like lights or sounds.
Reset the remote by removing the battery and pressing the buttons for 10 seconds. Then, put the battery back in and try again. If the remote still does not work, try reprogramming it according to the manufacturer’s instructions.
Interference Problems
Interference can block the signal between the remote and the garage door opener. Common sources include nearby electronics, fluorescent lights, or other wireless devices. Move any devices away from the garage door opener to reduce interference.
Try using the remote at different times of the day. Some signals may be stronger when fewer devices are active. If interference continues, consider changing the frequency settings on your opener if possible.
Battery Replacement Tips
Weak or dead batteries cause most remote failures. Use fresh batteries and ensure they fit properly in the remote. Check the battery terminals for corrosion and clean them with a dry cloth if needed.
Replace batteries regularly to avoid unexpected failure. Keep spare batteries in a cool, dry place for quick changes. After replacing the battery, test the remote immediately to confirm it works.
Credit: www.allstyledoor.com
Safety Tips During Programming
Programming your garage door opener remote requires care. Safety should be your top priority. Follow simple steps to avoid accidents and damage. This keeps you and your equipment safe during the process.
Keeping Clear Of Moving Parts
Stay away from the garage door while it moves. Moving parts can cause injury. Keep hands, fingers, and clothing clear of the door and tracks. Make sure pets and children are not near the door. Stand to the side during programming to avoid accidents.
Testing The Door Operation
After programming, test the door carefully. Use the remote to open and close the door slowly. Watch the door’s movement for any unusual sounds or stops. Stop the door immediately if it moves erratically. Check that the safety sensors work correctly before regular use.
Securing Remote Access
Keep your remote control in a safe place. Avoid leaving it where others can use it without permission. Change the remote’s code if your remote is lost or stolen. This prevents unwanted access to your garage. Protect your home by controlling who can open your garage door.
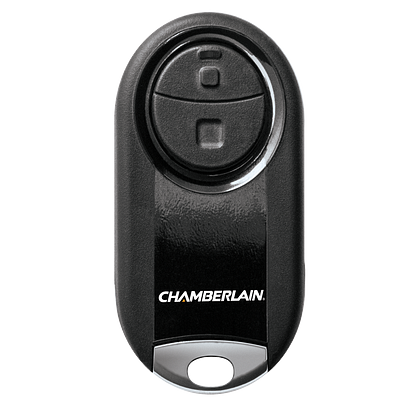
Credit: www.chamberlain.com
Frequently Asked Questions
How Do I Program A Garage Door Opener Remote?
To program, locate the “Learn” button on your garage door motor. Press it, then press the remote button within 30 seconds. The opener should respond with a click or light flash, confirming successful programming.
Can I Program Multiple Remotes To One Opener?
Yes, most garage door openers allow multiple remotes. Repeat the programming steps for each remote within the required time frame. Check your opener’s manual for the maximum number of remotes supported.
What If My Remote Won’t Program To The Opener?
Ensure the remote has fresh batteries and is compatible with your opener. Move closer to the opener and retry. If it still fails, reset the opener or consult the manual for troubleshooting tips.
How Long Does Programming A Garage Door Remote Take?
Programming usually takes less than five minutes. It involves pressing the “Learn” button and syncing the remote. Follow your specific opener’s instructions for the fastest results.
Conclusion
Programming your garage door opener remote is easy with these steps. Follow the instructions carefully and take your time. Double-check each step to avoid mistakes. Test the remote after programming to ensure it works. Keep the remote batteries fresh for best results.
Now, you can open your garage door with ease. Stay safe and enjoy the convenience of your remote. Simple tasks like this save time every day. Try programming another remote if needed. You’ve got this!
Disclosure: As an Amazon Associate, I may earn from qualifying purchases at no extra cost to you. Amazon and the Amazon logo are trademarks of Amazon.com, Inc, or its affiliates.
