
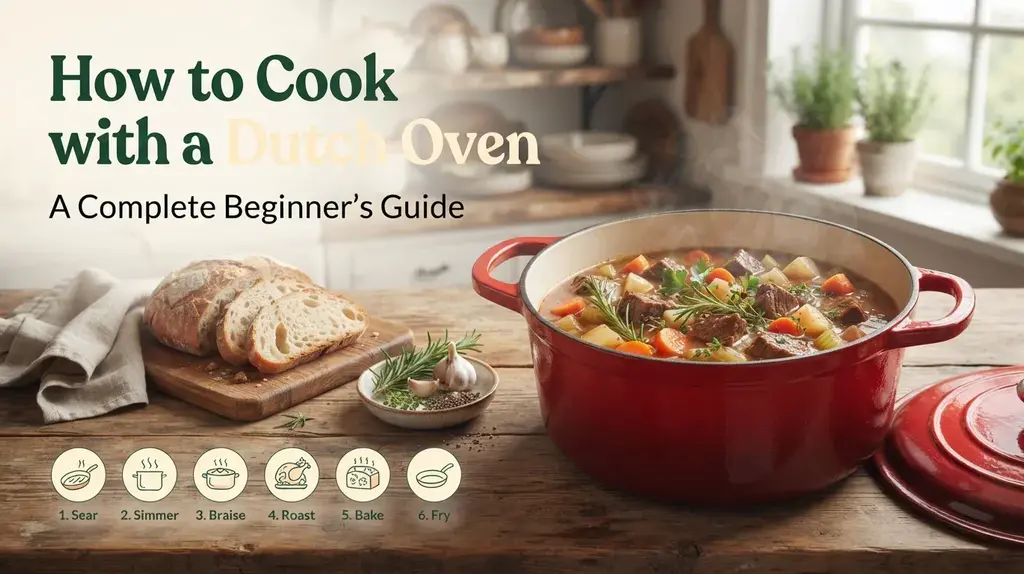
A Dutch oven is one of those kitchen tools that can make everyday cooking surprisingly simple. You can use it to brown meat, prepare a hearty beef stew, simmer homemade soup, roast chicken, bake bread, or cook a complete one-pot meal. The best part? Many recipes can move from the stovetop straight into the oven without transferring food to another dish.
But if you have recently purchased your first Dutch oven, you may be wondering how to use it properly. Should you heat it on high? Do you need to add oil before cooking? Should the lid stay on? And can you use the same pot for both stovetop and oven recipes?
Understanding a few basic techniques makes a big difference. Dutch ovens retain heat exceptionally well, which is helpful for slow cooking and braising, but that same quality means they need a slightly different approach from lightweight saucepans.
This guide explains how to cook with a Dutch oven from the beginning. You will learn how to prepare it, choose the right heat, use different cooking methods, avoid common mistakes, and decide which accessories are worth buying.
Whether you are using a traditional cast iron pot or an enameled Dutch oven, these practical tips will help you get more from your cookware.
How Do You Cook with a Dutch Oven?
To cook with a Dutch oven, place it on a suitable heat source, warm it gradually, add oil or cooking ingredients as needed, and adjust the heat according to your recipe. You can use it on the stovetop for searing, sautéing, frying, and simmering, or transfer compatible models into the oven for braising, roasting, and baking.
For beginners, remember these basic steps:
- Wash and dry the pot before its first use.
- Check whether it is bare or enameled cast iron.
- Heat it gradually rather than starting with maximum heat.
- Use low-to-medium heat for most everyday cooking.
- Choose a burner that matches the base size.
- Use suitable utensils and heat-resistant gloves.
- Follow the manufacturer’s oven temperature limits.
What Is a Dutch Oven and How Does It Work?
A Dutch oven is a heavy cooking pot with thick walls and a close-fitting lid. Most traditional models are made from cast iron, although modern versions are also available with an enamel coating.
Its main advantage is heat retention. Once the pot becomes hot, it holds that heat for a relatively long time and distributes it through the cooking vessel.
This makes it particularly useful for recipes that need consistent temperatures over extended cooking periods.
The lid is another important feature. When you cook with the lid on, it helps retain moisture and creates a more enclosed cooking environment. This is especially useful for braising meat, preparing stews, and baking certain types of bread.
Why Home Cooks Love Dutch Ovens
- Heat retention: The heavy construction maintains heat effectively.
- Versatility: One pot can handle several cooking methods.
- Moisture retention: The lid helps keep food moist during covered cooking.
- Stovetop-to-oven cooking: Compatible models can move between suitable heat sources.
- One-pot convenience: You can brown, simmer, and finish many recipes in the same cookware.
Understand Your Dutch Oven Before Cooking
Before turning on the stove, identify which type of Dutch oven you own. Traditional bare cast iron and enameled cast iron have similar cooking abilities, but their maintenance and handling requirements are different.
1. Bare Cast Iron Dutch Oven
A traditional cast iron Dutch oven has an uncoated cooking surface protected by seasoning. Seasoning is a layer formed from polymerized cooking oil that helps protect the iron and improves its cooking surface.
These pots are particularly popular for outdoor cooking, frying, roasting, and traditional cast iron cooking.
Advantages
- Excellent heat retention
- Very durable construction
- Suitable for many outdoor cooking applications
- Can be reseasoned when needed
Considerations
- Requires seasoning maintenance
- Can rust if stored damp
- Heavy to handle
- Acidic foods require more care
2. Enameled Cast Iron Dutch Oven
An enameled Dutch oven has a protective glass-like coating over its cast iron body. The coating provides a smooth cooking surface and removes the need for seasoning.
It is particularly convenient for everyday indoor cooking, including tomato-based sauces, soups, braised dishes, and casseroles.
Advantages
- No seasoning required
- Easy everyday cleaning
- Suitable for acidic recipes
- Available in many colours
Considerations
- Enamel can chip if mishandled
- Often more expensive
- Temperature limits vary by model
- Requires protection from thermal shock
| Feature | Bare Cast Iron | Enameled Cast Iron |
|---|---|---|
| Seasoning | Required | Not required |
| Heat retention | Excellent | Excellent |
| Cleaning | Requires drying and care | Generally easier |
| Acidic foods | Use more caution | Generally suitable |
| Rust protection | Depends on seasoning and care | Enamel protects coated surfaces |
| Outdoor use | Many models are suitable | Check manufacturer guidance |
How to Prepare a Dutch Oven Before First Use
A little preparation before cooking can help you avoid unnecessary problems.
Step 1: Remove Packaging and Labels
Remove all packaging materials, stickers, paper inserts, and labels. Check the manufacturer’s instructions for any additional preparation requirements.
Step 2: Wash the Pot
Wash the Dutch oven using warm water and mild dish soap. A soft sponge is suitable for most enameled models.
For bare cast iron, follow the manufacturer’s initial cleaning and seasoning instructions.
Step 3: Dry It Thoroughly
After washing, dry the pot completely using a clean towel.
This is particularly important for bare cast iron because moisture left on the surface can encourage rust.
Step 4: Season Bare Cast Iron if Necessary
If your Dutch oven is unseasoned bare cast iron, follow the manufacturer’s recommended seasoning process before cooking.
Many pre-seasoned cast iron products are ready to use after cleaning and drying, so check the product instructions before applying another layer of seasoning.
Enameled cast iron does not need this process.
Important: Do not apply seasoning oil to an enamel cooking surface as if it were bare cast iron. The two materials have different care requirements.
How to Use a Dutch Oven on the Stovetop
The stovetop is where a Dutch oven becomes especially versatile. You can use it for browning, sautéing, frying, boiling, and simmering.
However, cast iron holds heat very well, so you generally do not need to use maximum heat for everyday cooking.
1. Start with Gradual Heating
Place your Dutch oven on a burner that is similar in size to its base.
Start with a low or medium setting and allow the pot to warm gradually. This helps reduce sudden temperature changes, particularly with enameled cast iron.
Once the pot is warm, adjust the heat according to your recipe.
2. Add Oil or Cooking Ingredients
For most stovetop recipes, add a suitable cooking fat, oil, butter, or other ingredients before the pot becomes excessively hot.
Some manufacturers specifically recommend having oil or another cooking ingredient in an enameled Dutch oven before heating it. Follow the instructions for your particular model.
3. Avoid Unnecessary High Heat
Cast iron can maintain cooking temperatures without constantly using high heat.
For sautéing vegetables, simmering soups, and preparing sauces, low-to-medium heat is often sufficient.
When searing meat, you may need a higher initial temperature depending on the cookware and recipe. However, avoid prolonged maximum-heat preheating, particularly with enameled models.
4. Adjust the Temperature During Cooking
Once the pot becomes hot, you may need to reduce the burner setting.
Because cast iron retains heat, it does not cool as quickly as lightweight cookware. Turning down the heat early can help prevent food from scorching.
How to Cook Different Foods in a Dutch Oven
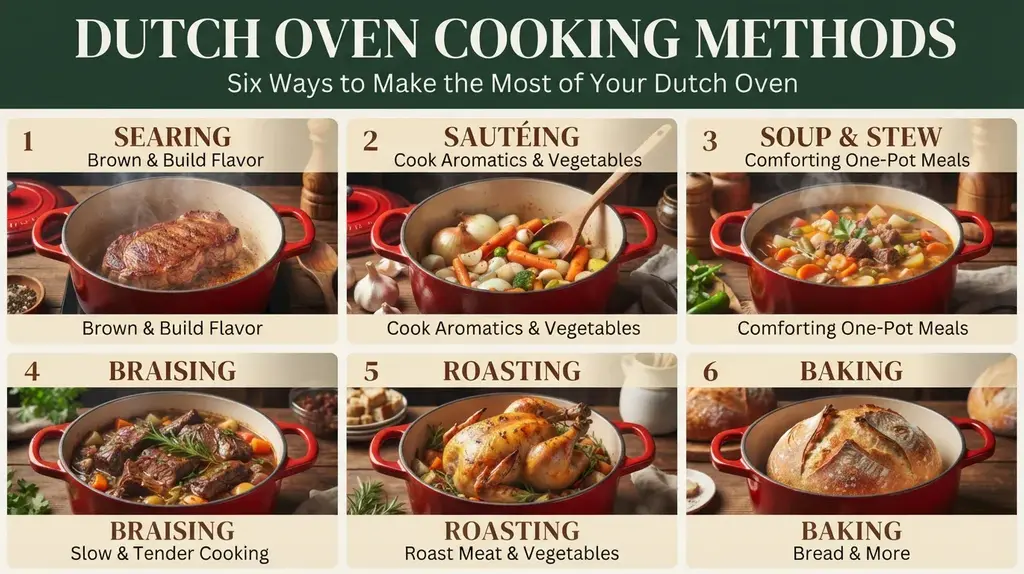
One of the biggest reasons to own a Dutch oven is the number of cooking methods it supports.
1. How to Sear Meat
A Dutch oven is excellent for browning beef, chicken, pork, and other ingredients before finishing a recipe.
To get a good sear:
- Pat the meat dry with paper towels.
- Allow it to lose some refrigerator chill if appropriate for the recipe.
- Warm the Dutch oven gradually.
- Add a suitable cooking oil.
- Place the meat in the pot without overcrowding it.
- Let the surface brown before turning.
- Remove the meat and set it aside if the recipe requires it.
Overcrowding is a common mistake. When too much food enters the pot at once, moisture builds up and the ingredients may steam instead of browning properly.
Cooking in batches usually produces a better result.
2. How to Sauté Vegetables
A Dutch oven works well for preparing onions, garlic, carrots, celery, mushrooms, and other vegetables.
- Warm the pot using low-to-medium heat.
- Add oil or butter.
- Add your vegetables.
- Stir occasionally until they soften or develop the desired colour.
- Add seasonings and other ingredients according to your recipe.
This is a useful starting point for soups, stews, sauces, and one-pot dinners.
3. How to Make Soup
The deep sides and heavy construction of a Dutch oven make it useful for homemade soup.
Start by sautéing aromatics such as onions, garlic, and celery. Add your main ingredients, stock, herbs, and seasonings.
Bring the mixture to a gentle simmer, then reduce the heat.
Let the soup cook until the vegetables, meat, or other ingredients reach the desired tenderness.
Keep the lid partially covered or fully covered depending on how much liquid you want to retain.
4. How to Make Stew
Beef stew is one of the classic recipes for a Dutch oven.
The cooking process usually begins with browning meat, followed by sautéing vegetables and adding stock or another cooking liquid.
Once everything is combined, cover the pot and allow the stew to cook gently until the meat becomes tender.
Low, steady heat is more useful than a rapid boil for many slow-cooked stew recipes.
5. How to Braise Meat
Braising combines dry and moist cooking methods. It generally involves browning food first and then cooking it slowly with a relatively small amount of liquid.
A Dutch oven is particularly useful because you can brown the ingredients on the stovetop and finish the cooking in the oven.
A basic braising process looks like this:
- Brown the meat in batches.
- Remove it temporarily from the pot.
- Sauté onions, garlic, and other aromatics.
- Add stock, wine, or another recipe-specified liquid.
- Return the meat to the pot.
- Cover with the lid.
- Transfer to an oven-safe setting if required.
- Cook slowly until the meat becomes tender.
This method works particularly well for tougher cuts of meat that benefit from longer cooking.
6. How to Roast Chicken or Vegetables
A Dutch oven can also be used for covered or uncovered roasting, provided the product is rated for the required oven temperature.
For chicken, season the bird, prepare your vegetables, and place everything inside the pot.
Follow a reliable recipe for the cooking temperature and timing. Use a food thermometer to check that poultry reaches a safe internal temperature.
For vegetables, combine suitable ingredients with oil, seasonings, and herbs. Roast until they reach your preferred texture and colour.
7. How to Fry Food
Traditional cast iron Dutch ovens are commonly used for deep-frying because their heavy construction helps maintain oil temperature.
They can be useful for frying chicken, potatoes, doughnuts, and other foods.
Deep-frying safety: Never fill a Dutch oven more than halfway with cooking oil. Leave plenty of room for bubbling and food displacement. Monitor the temperature carefully, never leave hot oil unattended, and keep water away from hot oil. Follow the manufacturer’s instructions for your specific cookware.
8. How to Bake Bread
Dutch ovens are also popular for baking artisan bread, particularly sourdough.
The enclosed environment helps retain steam released by the dough during the initial baking stage. This supports oven spring and helps develop a crisp crust.
A typical bread-baking process involves:
- Preparing and proofing the dough.
- Preheating compatible cookware according to the recipe and manufacturer instructions.
- Carefully transferring the dough into the pot.
- Baking with the lid on during the initial stage.
- Removing the lid to allow the crust to brown.
- Cooling the finished loaf before slicing.
If sourdough is your main reason for buying a Dutch oven, you may also find our guide to choosing the right Dutch oven size for sourdough helpful.
How to Use a Dutch Oven in the Regular Oven
One of the most convenient features of a Dutch oven is that compatible models can move from the stovetop into the oven.
This makes it possible to start a recipe by browning ingredients and then finish cooking everything in a controlled oven environment.
Step 1: Check Oven Compatibility
Before placing the pot in the oven, check its maximum temperature rating.
Do not assume that every cast iron Dutch oven has the same oven-safe limit.
Pay particular attention to the lid knob, handles, and any non-cast iron components.
Step 2: Prepare Your Ingredients
Brown meat or sauté vegetables on the stovetop if the recipe calls for it.
Add the remaining ingredients and cooking liquid.
Step 3: Cover the Pot
Place the lid securely on the Dutch oven when preparing covered recipes such as braises and stews.
For roasting or baking, follow the recipe to decide whether the lid should remain on or off.
Step 4: Transfer It Carefully
Use dry, heat-resistant oven mitts to move the pot into the oven.
Remember that the handles, lid, and knob may become extremely hot.
Step 5: Finish Cooking
Follow the recipe’s temperature and timing instructions.
Once the food is ready, remove the pot carefully and place it on a heat-resistant trivet.
Useful reminder: Never place a hot Dutch oven directly on a cold or delicate countertop. Use a suitable trivet or heat-resistant surface.
Should You Cook with the Dutch Oven Lid On or Off?
This depends on the result you want.
| Cooking Method | Lid Position | Why |
|---|---|---|
| Braising | Usually On | Helps retain moisture |
| Soup | On or Partially On | Controls evaporation |
| Stew | Usually On | Supports gentle covered cooking |
| Searing | Off | Allows moisture to escape |
| Frying | Off | Allows safe monitoring and moisture release |
| Sourdough Bread | On, Then Off | Retains steam initially, then browns the crust |
| Roasting | Recipe Dependent | Controls moisture and browning |
What Temperature Should You Use for Dutch Oven Cooking?
There is no single correct temperature for every Dutch oven recipe. The right setting depends on the cooking method, ingredients, cookware material, and manufacturer’s instructions.
The following table provides general cooking guidance rather than fixed temperature requirements.
| Cooking Method | Typical Heat Approach | Cooking Goal |
|---|---|---|
| Sautéing | Low to Medium | Soften and lightly brown ingredients |
| Searing | Moderate to Moderately High | Develop a browned surface |
| Simmering | Low | Maintain gentle bubbling |
| Braising | Gentle stovetop heat or moderate oven heat | Slowly tenderize ingredients |
| Roasting | Recipe Dependent | Cook and brown food evenly |
| Bread Baking | Recipe Dependent | Develop oven spring and crust |
Remember that oven temperature and stovetop heat settings are not interchangeable. A stovetop dial does not represent a precise cooking temperature inside the pot.
Common Dutch Oven Cooking Mistakes to Avoid
Even a high-quality Dutch oven can produce disappointing results when it is used incorrectly. Fortunately, most common problems are easy to avoid.
1. Starting with Maximum Heat
One of the biggest mistakes is turning the burner to maximum heat immediately.
Cast iron holds heat well, so excessive heat can cause food to burn and may damage enameled surfaces.
Allow the cookware to warm gradually and adjust the temperature as needed.
2. Heating an Empty Enameled Pot for Too Long
Some enameled cookware manufacturers recommend adding oil, butter, water, or other ingredients before heating.
Extended empty preheating can create excessive surface temperatures and increase the risk of enamel damage.
3. Overcrowding the Pot
Adding too much meat or too many vegetables at once can cause ingredients to release moisture and steam rather than brown.
Cook in batches when necessary.
4. Using the Wrong Utensils
Metal utensils can scratch or damage some enamel surfaces.
Wooden, silicone, or other manufacturer-approved utensils are generally a safer choice for enameled cookware.
5. Ignoring the Lid Temperature Rating
A Dutch oven may have a cast iron body but a knob made from another material.
That component may have a lower temperature limit than the pot itself.
Always check the complete product specifications before oven use.
6. Exposing Hot Cookware to Cold Water
Sudden temperature changes can damage enamel and may cause cracking or chipping.
Allow the pot to cool gradually before cleaning.
7. Storing Bare Cast Iron While Damp
Moisture can lead to rust on uncoated cast iron.
Dry it completely after washing and follow the manufacturer’s care instructions.
What Accessories Make Dutch Oven Cooking Easier?
You do not need a large collection of accessories to cook successfully with a Dutch oven. A few useful items can make preparation, cooking, and handling much easier.
1. Heat-Resistant Oven Mitts
Cast iron becomes extremely hot and stays hot for a long time.
Good-quality oven mitts help protect your hands when moving the pot, lifting the lid, or removing food from the oven.
2. Silicone or Wooden Cooking Utensils
These are useful for stirring sauces, mixing ingredients, and scraping food from enameled cooking surfaces without using abrasive metal tools.
3. Heat-Resistant Trivet
A trivet protects countertops and dining tables from hot cookware.
It is particularly useful when taking a Dutch oven directly from the oven to the table.
4. Cooking Thermometer
A food thermometer helps you check whether meat and poultry have reached a safe internal temperature.
It is a useful tool for beginners and experienced home cooks alike.
5. Parchment Paper
Parchment paper can make transferring sourdough dough into compatible Dutch ovens easier.
Always use parchment that is rated for the baking temperature and follow the manufacturer’s instructions.
Best Dutch Oven Products and Accessories to Consider
If you are shopping for your first Dutch oven or upgrading your existing cookware, it helps to compare products based on how you plan to cook.
Here are some product categories and established brands worth considering.
1. Lodge Cast Iron Dutch Oven
Best for: Budget-conscious cooks and traditional cast iron enthusiasts
Lodge is a well-known American cast iron cookware brand. Its traditional Dutch ovens are worth comparing if you want a durable pot for stovetop cooking, roasting, stews, and suitable outdoor cooking.
Bare cast iron models require proper seasoning and drying, so consider the maintenance involved before purchasing.
Pros
- Traditional cast iron construction
- Excellent heat retention
- Versatile cooking applications
- Often more affordable
Cons
- Requires seasoning care
- Can rust if stored damp
- Heavy construction
2. Lodge Enameled Cast Iron Dutch Oven
Best for: Everyday indoor cooking
If you like Lodge cookware but prefer a smooth enamel surface, its enameled cast iron collection is worth comparing.
These pots are useful for soups, stews, sauces, braising, and other everyday recipes.
Pros
- No seasoning required
- Convenient everyday cleaning
- Good heat retention
- Suitable for many recipes
Cons
- Enamel can chip
- Requires careful temperature control
- Heavy to lift
Check Lodge Enameled on Amazon
3. Le Creuset Signature Dutch Oven
Best for: Premium everyday cookware
Le Creuset is an established French cookware brand known for its enameled cast iron Dutch ovens.
Its cookware is suitable for a wide range of recipes, from slow-cooked meals to soups and sauces.
It is a premium option, so compare the capacity, exact model, oven-safe temperature, and warranty before buying.
Pros
- Premium enameled construction
- No seasoning required
- Versatile everyday design
- Multiple size and colour options
Cons
- Higher purchase price
- Heavy cookware
- Enamel requires careful handling
4. Staub Cast Iron Cocotte
Best for: Premium slow cooking and braising
Staub is another established French cookware brand offering enameled cast iron cocottes.
Its cookware is worth considering if you regularly prepare braised dishes, soups, stews, and slow-cooked meals.
Compare the capacity, lid design, weight, and oven temperature rating for the specific product.
Pros
- Premium cast iron construction
- Distinctive design
- Suitable for slow cooking
- Enamel cooking surface
Cons
- Premium pricing
- Heavy construction
- Requires careful handling
How to Choose the Right Dutch Oven for Your Kitchen
Buying a Dutch oven is easier when you know what matters most for your cooking habits.
Choose the Right Capacity
A smaller Dutch oven may be enough for one or two people, while larger households may benefit from a 5.5- to 7-quart model.
| Capacity | Typical Use |
|---|---|
| 2–3 quarts | Small portions and side dishes |
| 4–5 quarts | Couples and smaller households |
| 5.5–6 quarts | General family cooking |
| 7–8 quarts | Large meals and batch cooking |
| 9+ quarts | Large gatherings and special recipes |
Decide Between Round and Oval
Round Dutch ovens are versatile for soups, stews, and everyday stovetop cooking. Oval models can be useful for larger cuts of meat, whole poultry, and elongated ingredients.
Consider Your Cooktop
Most cast iron Dutch ovens work with gas, electric, and induction cooktops, but always verify compatibility for your exact model.
If you have a glass or ceramic cooktop, lift the pot rather than sliding it to help protect the surface.
Think About Weight and Storage
Large cast iron cookware can be difficult to move and store.
Consider your available cabinet space and whether you can comfortably lift the pot when it is full.
Compare the Total Cost
Do not compare products based on price alone. Consider capacity, construction, warranty, maintenance, and the types of recipes you plan to prepare.
Where to Buy a Dutch Oven
Once you have decided on the right size and material, the next step is comparing available cookware.
Amazon is a convenient place to explore different Dutch oven brands, read customer reviews, compare specifications, and check current offers.
Shop from Your Local Amazon Store
Shopping for a Dutch oven from the USA, UK, or Canada? You can use the Amazon product links in this guide to explore available cookware in your region.
With Amazon OneLink enabled, eligible visitors may be redirected to their local Amazon storefront when they click an affiliate link. This can make it easier to check local product listings, pricing, and delivery options.
Product availability, prices, shipping costs, and discounts may vary by country. Always review the final product listing before purchasing.
Buying in the USA
US shoppers can compare cookware on Amazon.com. Check product capacity, seller information, delivery options, and warranty coverage.
Buying in the UK
UK shoppers can compare products on Amazon.co.uk. Pay attention to capacity measurements in litres and quarts, as well as oven-safe temperatures in Celsius.
Buying in Canada
Canadian shoppers can compare available options on Amazon.ca. Review the final price in Canadian dollars, shipping charges, and local warranty terms.
FAQs About How to Cook with a Dutch Oven
What can you cook in a Dutch oven?
You can cook soups, stews, braised meat, roasted chicken, vegetables, sauces, fried foods, casseroles, and homemade bread in a Dutch oven. Its heavy construction makes it suitable for several stovetop and oven cooking methods.
Do you need to season a Dutch oven before using it?
It depends on the material. Bare cast iron Dutch ovens need seasoning unless they are already properly pre-seasoned. Enameled cast iron Dutch ovens do not require seasoning.
Can you put a Dutch oven directly on the stovetop?
Yes, most Dutch ovens are designed for stovetop use. Check your product’s cooktop compatibility and heat recommendations. Use gradual heating and avoid prolonged maximum heat, especially with enameled cast iron.
Should you cook with a Dutch oven lid on or off?
Use the lid for recipes that benefit from retained moisture, such as braising and stewing. Leave it off when searing or when you want excess moisture to evaporate. Some bread recipes use the lid initially and remove it later for crust browning.
Can you use an enameled Dutch oven for high-temperature cooking?
It depends on the specific product. Enameled cast iron models have different temperature limits based on their construction, lid, and knob materials. Always follow the manufacturer’s oven and stovetop instructions.
What size Dutch oven is best for everyday cooking?
A 5.5- to 6-quart Dutch oven is a versatile starting point for many households. It offers enough room for common soups, stews, braised dishes, and family meals. Smaller households may prefer a 4- to 5-quart model, while larger families may need more capacity.
Final Thoughts: Get More from Your Dutch Oven
Learning how to cook with a Dutch oven does not require complicated techniques or expensive kitchen equipment.
Start by understanding the type of cookware you own, warm it gradually, and choose the right heat for the recipe. Once you become comfortable with the basics, you can experiment with searing, sautéing, simmering, braising, roasting, frying, and baking.
If you are buying your first Dutch oven, focus on a practical size, suitable material, comfortable handles, and the temperature rating of the complete product.
A well-chosen Dutch oven can become one of the most useful pieces of cookware in your kitchen. It can handle everyday dinners, slow-cooked weekend meals, homemade soups, and even artisan bread.
The best way to master a Dutch oven is to start with simple recipes, understand how it responds to heat, and gradually explore everything this versatile pot can do.
Disclosure: As an Amazon Associate, I may earn from qualifying purchases at no extra cost to you. Amazon and the Amazon logo are trademarks of Amazon.com, Inc, or its affiliates.
