

Your can opener works hard every time you crack open a can, but when was the last time you cleaned it properly? A dirty can opener can hide bacteria and affect the taste of your food.
If you want to keep your kitchen safe and your meals fresh, learning how to clean your can opener the right way is essential. You’ll discover simple steps that take just minutes but make a big difference. Keep reading, and you’ll never worry about a grimy can opener again.
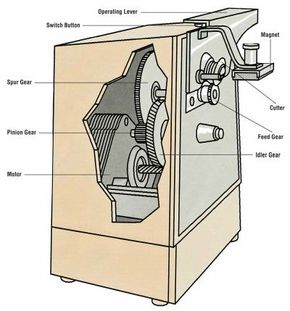
Credit: home.howstuffworks.com
Choosing The Right Can Opener
Choosing the right can opener makes cleaning easier and safer. The right tool helps avoid rust and keeps your kitchen tidy. Consider the type and material before buying. This choice affects how well you clean the opener later.
Manual Vs Electric Openers
Manual can openers need hand effort. They are simple and easy to clean. Electric openers work fast with less effort. They have more parts to clean carefully. Manual openers are good for small jobs. Electric ones suit frequent use and big cans.
Materials And Durability
Can openers come in steel, plastic, or a mix. Stainless steel lasts longer and resists rust. Plastic parts may break but weigh less. Choose a can opener with strong materials. Durable tools stay clean and safe for years.
Essential Cleaning Tools
Cleaning a can opener is simple with the right tools. Proper tools help remove food bits and germs easily. They protect the can opener’s sharp parts. Use tools that reach small areas and clean well. This keeps your kitchen safe and your can opener working smoothly.
Recommended Brushes And Cloths
Use a small brush with stiff bristles. A toothbrush works well to scrub the blade and gears. Microfiber cloths are soft and trap dirt. Avoid rough cloths that may damage the metal. Cotton swabs help clean tiny spaces. Choose brushes and cloths that dry fast to stop bacteria growth.
Safe Cleaning Agents
Mild dish soap is perfect for cleaning without harm. Warm water helps loosen stuck food. White vinegar kills germs and removes rust. Baking soda works as a gentle scrub. Avoid bleach or strong chemicals. These can damage your can opener’s metal parts.
Step-by-step Cleaning Process
Cleaning a can opener properly keeps it safe and working well. Dirt and food bits can hide in small parts. This step-by-step process helps you clean every part carefully. Follow these simple steps to make your can opener clean and ready for use.
Disassembling The Can Opener
Start by taking the can opener apart. Look for screws or clips that hold the parts together. Remove the cutting wheel and handles if possible. Disassembling lets you clean all hidden spots. Keep track of small parts to avoid losing them.
Removing Food Residue
Check the cutting wheel and gears for stuck food. Use a toothpick or small brush to remove residue. Clean out any food bits from the crevices. This step prevents bacteria build-up and bad smells. Be gentle to avoid damaging the parts.
Washing And Scrubbing
Wash all parts with warm, soapy water. Use a sponge or brush to scrub surfaces. Focus on the cutting wheel and gear teeth. Rinse well to remove soap and dirt. Avoid soaking metal parts too long to stop rust.
Drying And Reassembling
Dry each part with a clean towel. Let them air dry for a few minutes to remove moisture. Reassemble the can opener carefully in the right order. Check that all parts move smoothly. Your can opener is now clean and ready to use.
Deep Cleaning For Stubborn Build-up
Stubborn build-up on a can opener can block its sharp edge and make it hard to use. Deep cleaning removes grease, rust, and food bits stuck in hard-to-reach spots. This process keeps your can opener working smoothly and lasts longer.
Deep cleaning takes a bit more time than regular wiping. It involves soaking and scrubbing with safe household items. These steps break down tough grime without damaging your tool.
Soaking Techniques
Fill a bowl with warm, soapy water. Submerge the can opener for 10 to 15 minutes. This softens dried food and loosens dirt in small areas.
Use a toothbrush or small brush to scrub the blade and gears gently. Rinse with clean water and dry with a towel. Repeat soaking if needed for stubborn spots.
Using Vinegar And Baking Soda
Make a paste with equal parts baking soda and water. Spread it on the can opener’s blade and moving parts. Let it sit for 10 minutes to break down rust and grease.
Dip a cloth or brush in white vinegar and scrub the baking soda paste. The fizzing helps lift grime effectively. Rinse thoroughly and dry completely before storing.
Maintaining Your Can Opener
Maintaining your can opener helps it work well for a long time. A clean and well-kept can opener opens cans smoothly. Dirt and rust can stop it from working right. Regular care keeps it safe and easy to use.
Regular Cleaning Schedule
Clean your can opener after each use. Wipe the blade and handle with a damp cloth. Use warm, soapy water to remove food bits. Dry it well to stop rust from forming. Deep clean your can opener once a week. Soak the blade part in vinegar for a few minutes. Scrub gently with a soft brush to clear stuck food. Rinse and dry completely before storing.
Lubricating Moving Parts
Apply a small drop of food-safe oil to the moving parts. This keeps the blade turning smoothly. Use a clean cloth to spread the oil evenly. Avoid using too much oil to prevent mess. Wipe off any extra oil to keep it clean. Lubricate your can opener once a month or as needed. This simple step stops parts from sticking or squeaking.
Troubleshooting Common Issues
Can openers are useful kitchen tools. Over time, they may face problems that stop them from working well. Knowing how to fix these issues helps keep your can opener working longer. This section covers common troubles and how to solve them.
Blade Dullness
A dull blade makes opening cans hard. It can cause jagged edges and require more force. Clean the blade after every use to prevent dullness. If the blade stays dull, consider replacing it. Some models allow blade swaps. Check your can opener’s manual for details.
Jamming And Misalignment
Jamming happens when the can opener does not move smoothly. Food bits or rust can cause this. Clean all parts carefully, especially around the blade and gears. Misalignment means the blade and wheel do not line up. This can stop the can opener from cutting properly. Tighten screws or adjust the parts slightly to fix this. Regular cleaning helps avoid these problems.
Frequently Asked Questions
How Often Should I Clean My Can Opener?
Clean your can opener after every use. This prevents rust and removes food residue. Regular cleaning keeps it hygienic and functioning well.
What Materials Are Best For Cleaning A Can Opener?
Use warm soapy water, a toothbrush, and a cloth. Avoid harsh chemicals. These materials effectively remove grime without damaging the opener.
Can I Clean A Can Opener In The Dishwasher?
Most manual can openers are not dishwasher safe. Hand washing is recommended to preserve sharpness and prevent rust. Always check the manufacturer’s instructions.
How Do I Remove Rust From My Can Opener?
Use a mixture of baking soda and water to scrub rust gently. Rinse and dry thoroughly. This natural method restores the opener without harsh chemicals.
Last Thoughts
Cleaning a can opener keeps it working well and safe to use. Wipe it after each use to stop germs and rust. Use warm water and soap to remove food bits easily. Dry it fully to avoid moisture damage. Regular care helps your can opener last longer.
Simple steps make a big difference. Keep your kitchen tools clean and ready for the next meal. Small efforts save time and money later. Clean can openers make cooking easier and safer.
Disclosure: As an Amazon Associate, I may earn from qualifying purchases at no extra cost to you. Amazon and the Amazon logo are trademarks of Amazon.com, Inc, or its affiliates.
